
This dolls house has been a long time in the making. And by long time, I mean three years! We bought this second hand on gumtree when Alaska was born.
I remember driving up to the ladies house, with my two week old asleep in her seat. I got all excited envisioning doing up the dolls house for her first birthday. Fast forward a few years and here we are finally gifting it to our daughter, on her THIRD birthday!
This was a total bargain for $50 off Gumtree. If you have the patience to search through second hand online stores, one will pop up eventually. But they snap up fast so if you find one, don’t think about it for too long. You can also buy them brand new for about $500, but it takes the fun out of doing it up and adding your own flare.
I’ve saved all of the videos of Alaska’s reaction to my instagram highlights. She was so happy and grateful it made everyone cry! Find the highlight saved HERE.

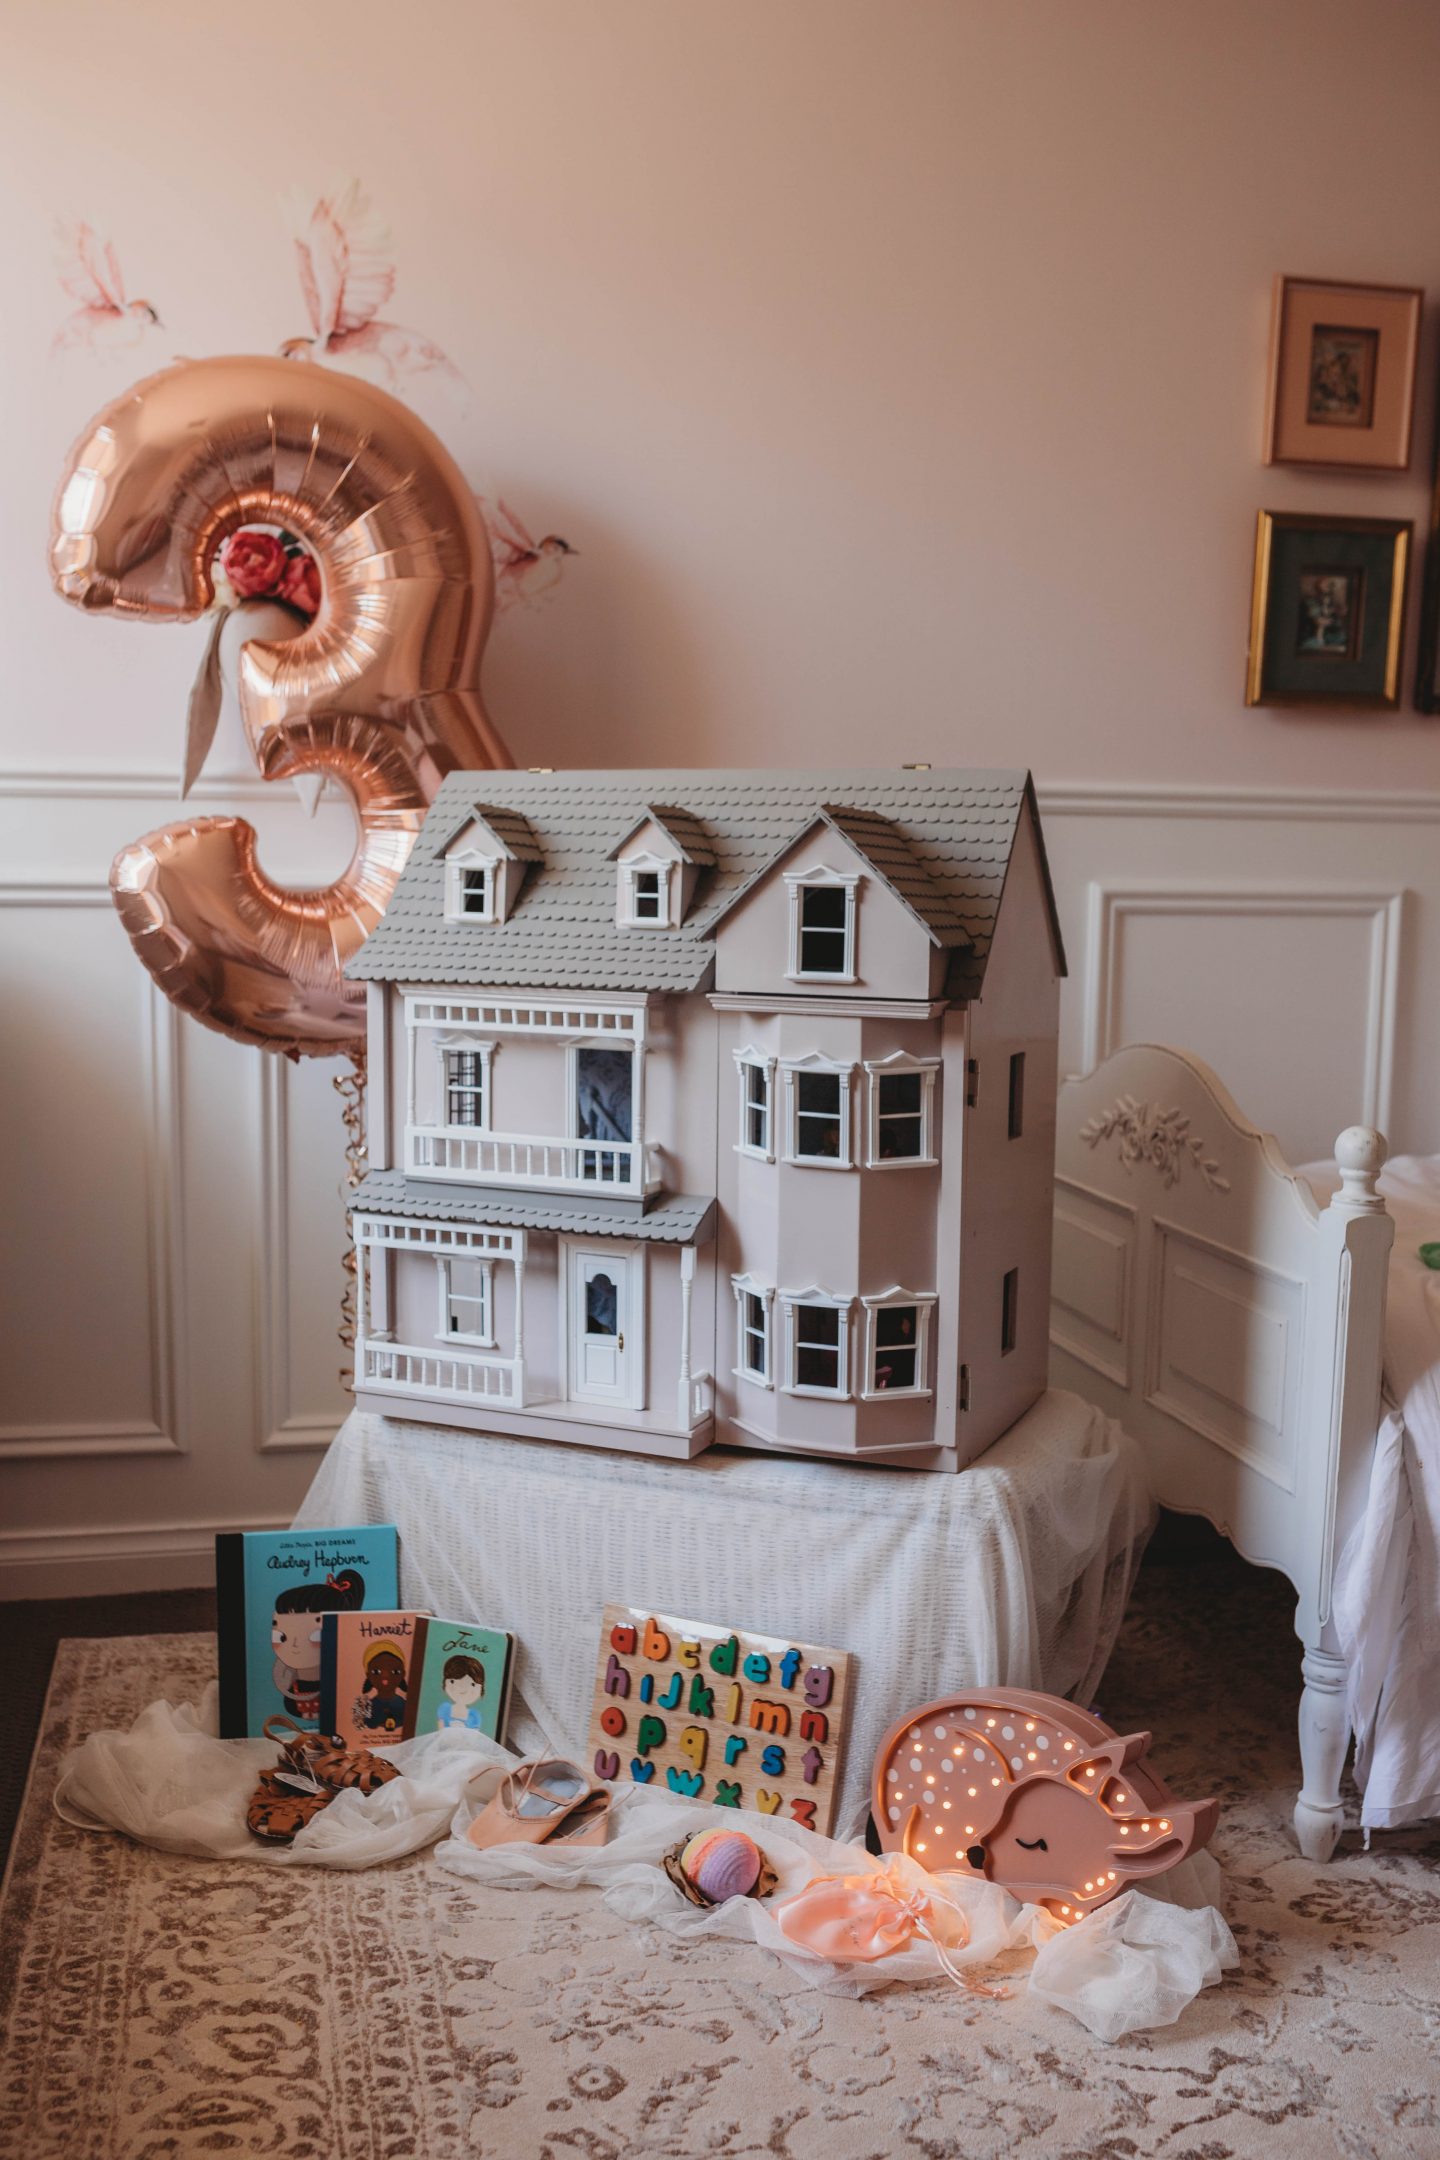

Doing up this dolls house has been such a fun project. As been works FIFO it means he was only able to work on it while he was home every few weeks. It was also a really time consuming process with panting and fixing broken parts. This dolls house wasn’t a standard size so it meant all of the doors and window were super hard to find.
If you’re planning on renovating a dolls house, here is my handy go to list.


The Make Over
- Used spray paint, found this easier to apply
- Gave the entire house a light sanding down before painting
- Took it all apart to paint- Removed the doors, roof and painted it all separately
- Removed the ballistraid from the front, painted and repaired
- Laid out all of the furniture and spray painted
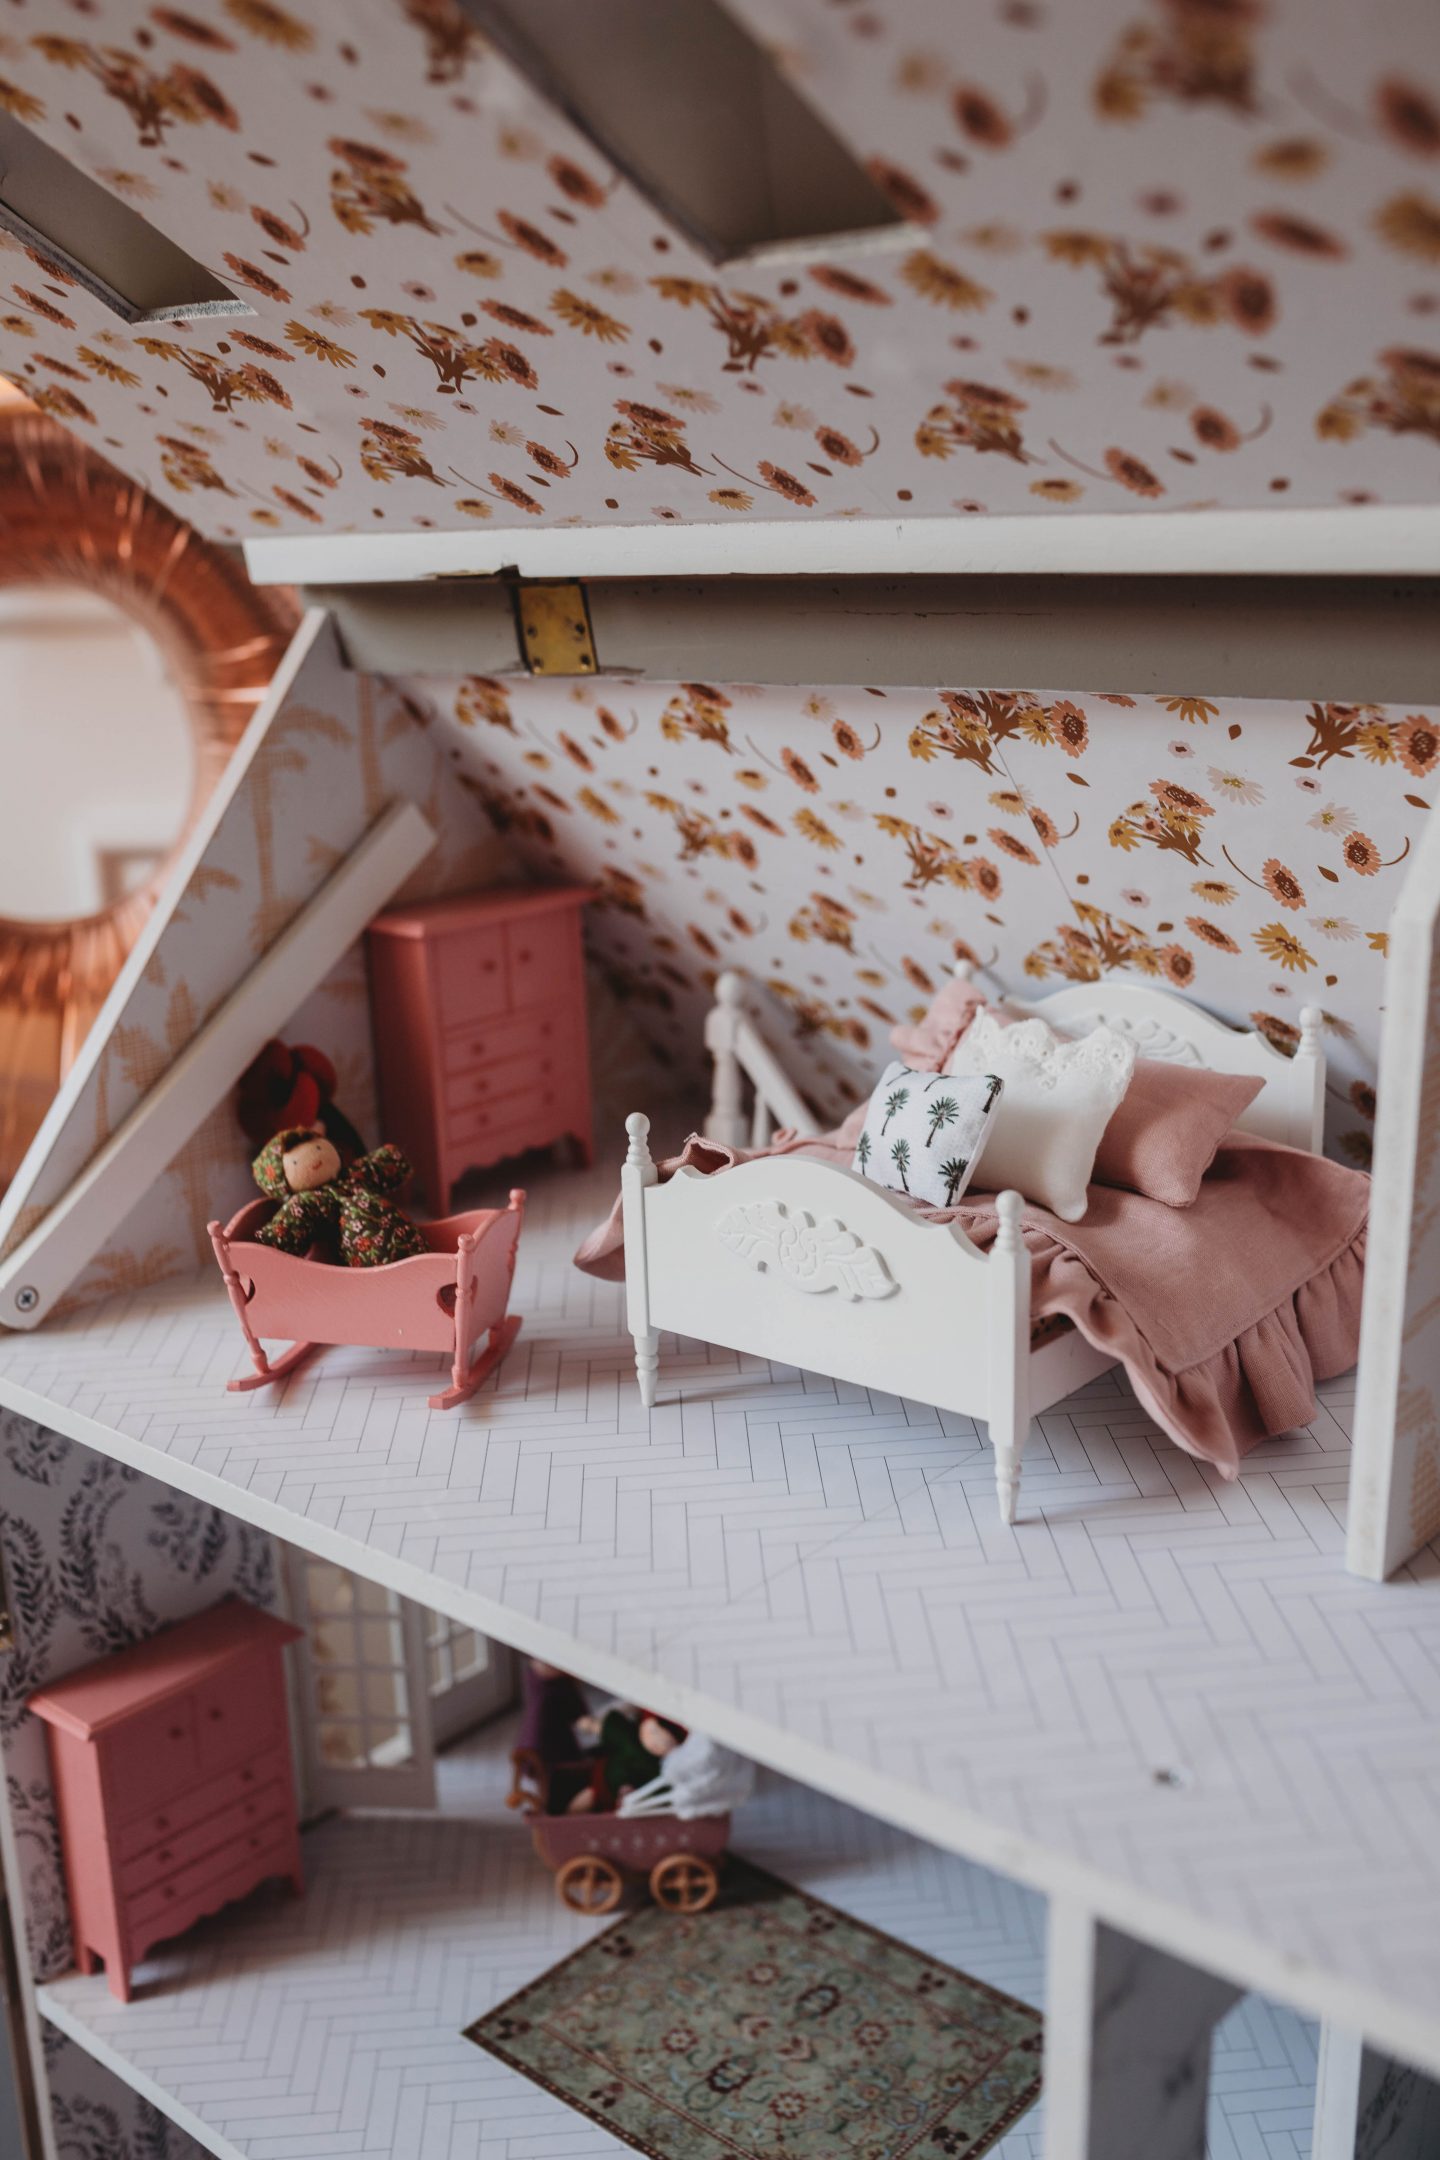
- Used self adhesive removable dolls house wall paper- Super easy to apply
- Cut around the front door hole to fit a new front door as we couldn’t find a door to fit anywhere online
- Added magnetic strips so the front doors stay closed


Dolls House Parts
- Replaced the hinges with new from Bunnings HERE
- Wall paper was self adhesive and made for dolls houses from Minnie and Me Interiors HERE. Code “Kyreeloves” for discount
- Doors and window frames from HERE. If you’re confused with what to buy, then email Fairy Meadow Miniatures as they were extremely helpful and even custom ordered some parts for us.
- Door handles, toilet roll holder etc Fairy Meadow Miniatures HERE
- Little gold photo frames Mini Mum World HERE
- Dolls bedding custom made Ivy and Aida HERE
- Dolls furniture mainly from $2 store / Reddot. Some of the furniture came with the house second hand.
- The queen bed Mini Mum World HERE
- The bunk beds Ebay HERE
- The sticky floor rugs Mini Mum World HERE
- The little felt people The Small Folk HERE
- White vintage fridge from Ebay similar HERE


This blog is in no way sponsored, all thoughts, images, opinions and advice are completely my own. Don’t forget to stop by my Instagram page for more inspo, shits & giggles.


I’m curious about what colour did you used? It’s very clean and classy. The kids would surely love the renovation. You’ve really done a good job.
What colours did you use for the roof and outside they are lovely!
Love this post! I am about to embark on a doll house renovation project, so this post has been super helpful, thank you. You mentioned above that you recommend using spray paint, can you please tell me what paint it was? Did you use a gloss for any parts? Thanks